GL.iNet Gls-10 - a POE powered bluetooth gateway
The GL.iNet GL-S10 is a small IoT gateway based on an ESP32 which has the particularity of being POE powered. It’s apart from this rather unremarkable which makes it perfect for running ESPHome which is increasingly attractive due to the new bluetooth proxy feature in homeassistant. They’re also super hackable and this seems fully supported by the vendor which even gives relatively nice instructions.
Aquiring such devices is pretty easy from the usual sources, I found mine on ebay for ~30eur each since I’m impatient and didn’t want to wait. There are much cheaper ways to use ESPHome but I didn’t look all that far.
Versions⌗
There are unfortunately two versions of this device with different ethernet PHYs. I’ve no idea which is better and usually there seems to be no way of knowing when buying. Luckily both versions seem supported, in the wild both 2.3 and 1.0 devices are found. Mine are 1.0 devices which I guess means they’re old stock.
ESPHome on the commandline⌗
There are many guides for ESPHome but most seem to involve random webpages etc, with a bit of digging I found a much easier way to deal with my devices that I’m happy with
Preparation⌗
First we’ll install esphome and then clone the bluetooth proxies repo we’ll use to store our gl-s10 configuration
pip install --upgrade --user esphome
git clone git@github.com:esphome/bluetooth-proxies.git
cd bluetooth-proxies/
If you have a 1.0 device you should modify the proxy file like so:
--- gl-s10.yaml	2022-10-08 17:14:23.440001644 +0200
+++ gl-s10_v1.0.yaml	2022-10-09 07:04:06.563349749 +0200
@@ -19,22 +19,12 @@
   framework:
     type: arduino

-# Configuration fo V2.3 hardware revision
 ethernet:
-  type: IP101
+  type: LAN8720
   mdc_pin: GPIO23
   mdio_pin: GPIO18
   clk_mode: GPIO17_OUT
   phy_addr: 1
-  power_pin: GPIO5
-
-# Comment the above and use this instead for V1.0 revision of the hardware
-# ethernet:
-#   type: LAN8720
-#   mdc_pin: GPIO23
-#   mdio_pin: GPIO18
-#   clk_mode: GPIO17_OUT
-#   phy_addr: 1
Then you can compile esphome
esphome compile gl-s10.yaml
Flashing⌗
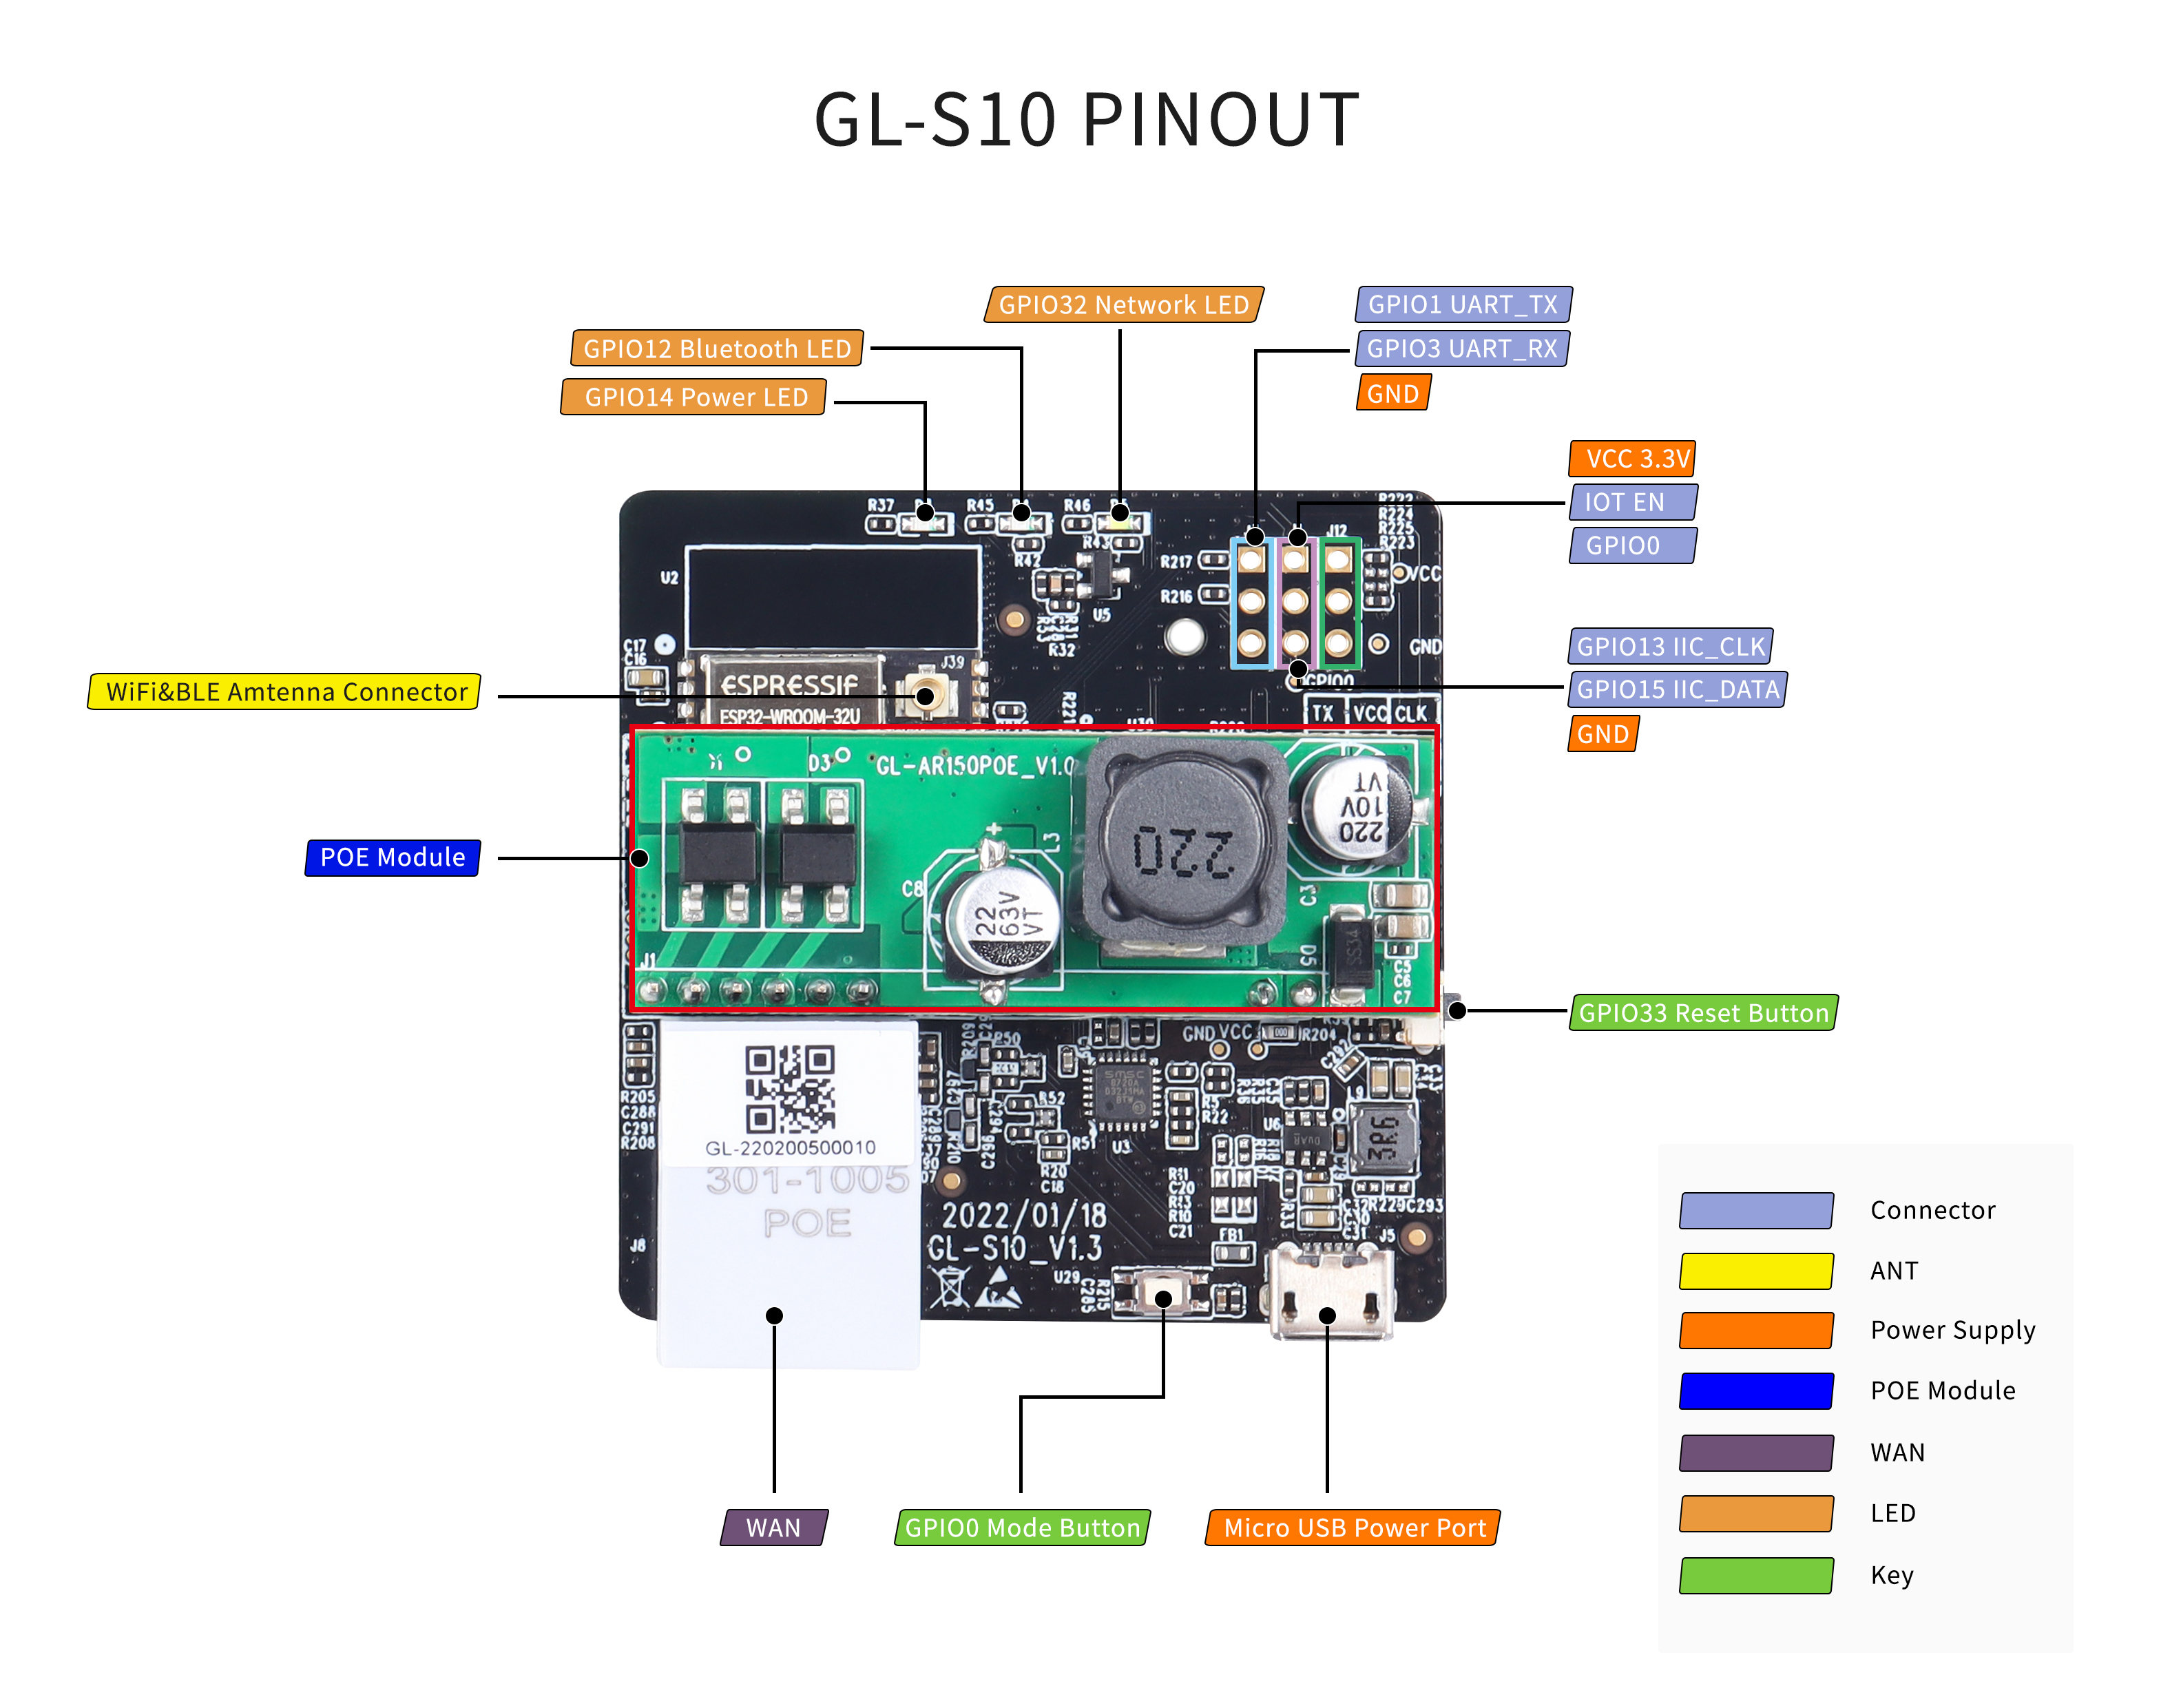
Opening the device is pretty easy, there is a small tab in the back which you can use with a 2.5mm flathead screwdriver to pry open. Once open, the unit is just slipped into the casing so just carefully remove it. The easiest way to deal with the device is to solder a small 3 pin header to the GPIO headers on the top left of the board circled in blue in this nice diagram. Once you’ve soldered the 3 pins, I used an FTDI TTL-232R-3V3 cable but any serial port will do, you only need GND, TX & RX.

Warning you should only use POE or Micro USB, using both will damage the unit. In order to avoid any issues, I stuck a small label on the microUSB port.
Once you have everything hooked up just connect your power source (POE or microUSB) whilst pressing the GPIO mode button (~2s seems to do the trick). Then upload your newly compiled firmware, and reboot by unplugging your power source (note the reset button does not seem to work in the bootloader mode).
esphome upload gl-s10.yaml --device /dev/ttyUSB0
OTA flashing⌗
After you have ESPHome installed on the device and it’s functional, you should not need to use the UART port anymore and can flash directly via IP like this:
esphome upload gl-s10.yaml --device 192.168.xx.xx
Adding to homassistant⌗
This part is super easy, the device should be automatically detected after a few seconds as long as the network allows this.